The family photo album passed down from Julia Etta Squire Anderson to her daughter Mary Elizabeth Anderson Wilson, and then to her daughter Nellie Pauline Wilson Gritten, is a treasure trove of interesting and beautiful photographs that document the family’s long history. Thoughtfully, the caretakers of this family history frequently made detailed notes on the back of photographs describing the people and places featured, as well as their relationships within the family group. In combination with this information, pervious genealogical work and Graphics Atlas, as well as other online resources for identifying old photographs, new discoveries of family history have been made with the help of the information gleaned from these artifacts. Not all photographs include this level of detail, so when attempting to identify subjects, knowing the type of photograph and cabinet card can narrow down the potential subjects identity. For this blog post, they can be helpful examples useful for exploration of dating methods, and for understanding the different types of cabinet cards and their cultural significance.

This album represents the lovingly curated history of a family; the people are long dead, but their family continues. Each photograph has a story to tell. Comparing the information from captions and inscriptions on the backs of photographs, and even personal notes about the subjects, and exploring genealogy profiles concurrently as I digitized the photos, I really feel as if I’ve come to know them all. By using the guidelines here and the “how to tips”, I was able to not only date the photographs, but the dates once identified, assisted with pin pointing the names of the individuals pictured. In some cases, hidden stories were uncovered. To see the album in its original state, click on the album link above or here.
Tips and Definitions:
Children’s Gender
Children’s photos in this collection are particularly interesting, but the nineteenth century convention of dressing both boys and girls in dresses can pose an obstacle to identification. One simple tip helps narrow the field of identifiers.
Children’s gender in 1800’s photographs may be identified by examining the hair part. Girls parted their hair in the middle, boys on the side. This is helpful because girls and boys were dressed in a similar fashion in this period- both wore dresses for the first few years of their lives.
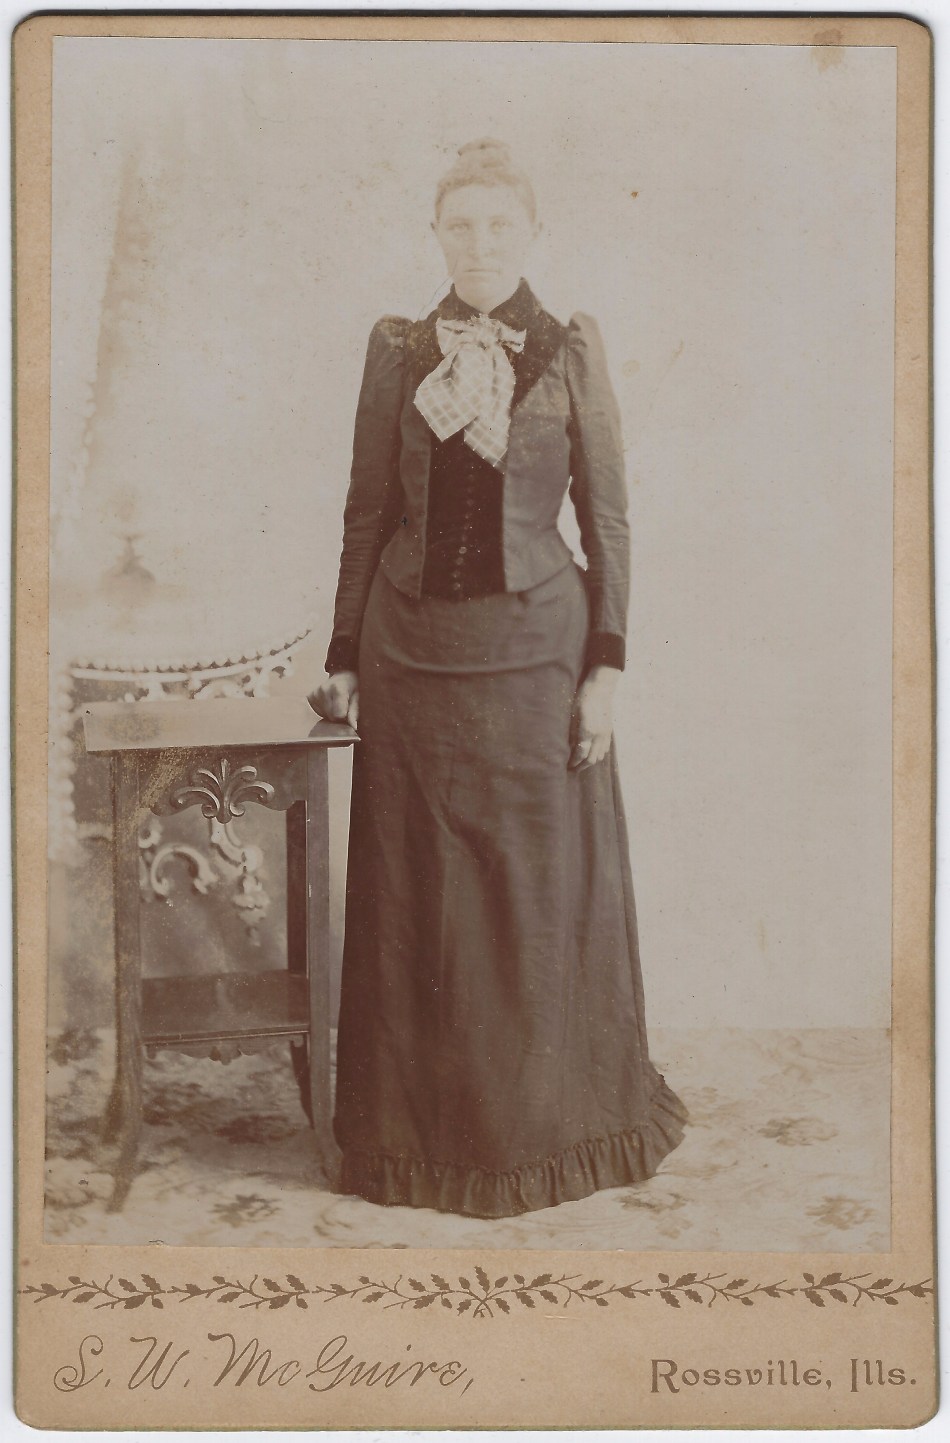
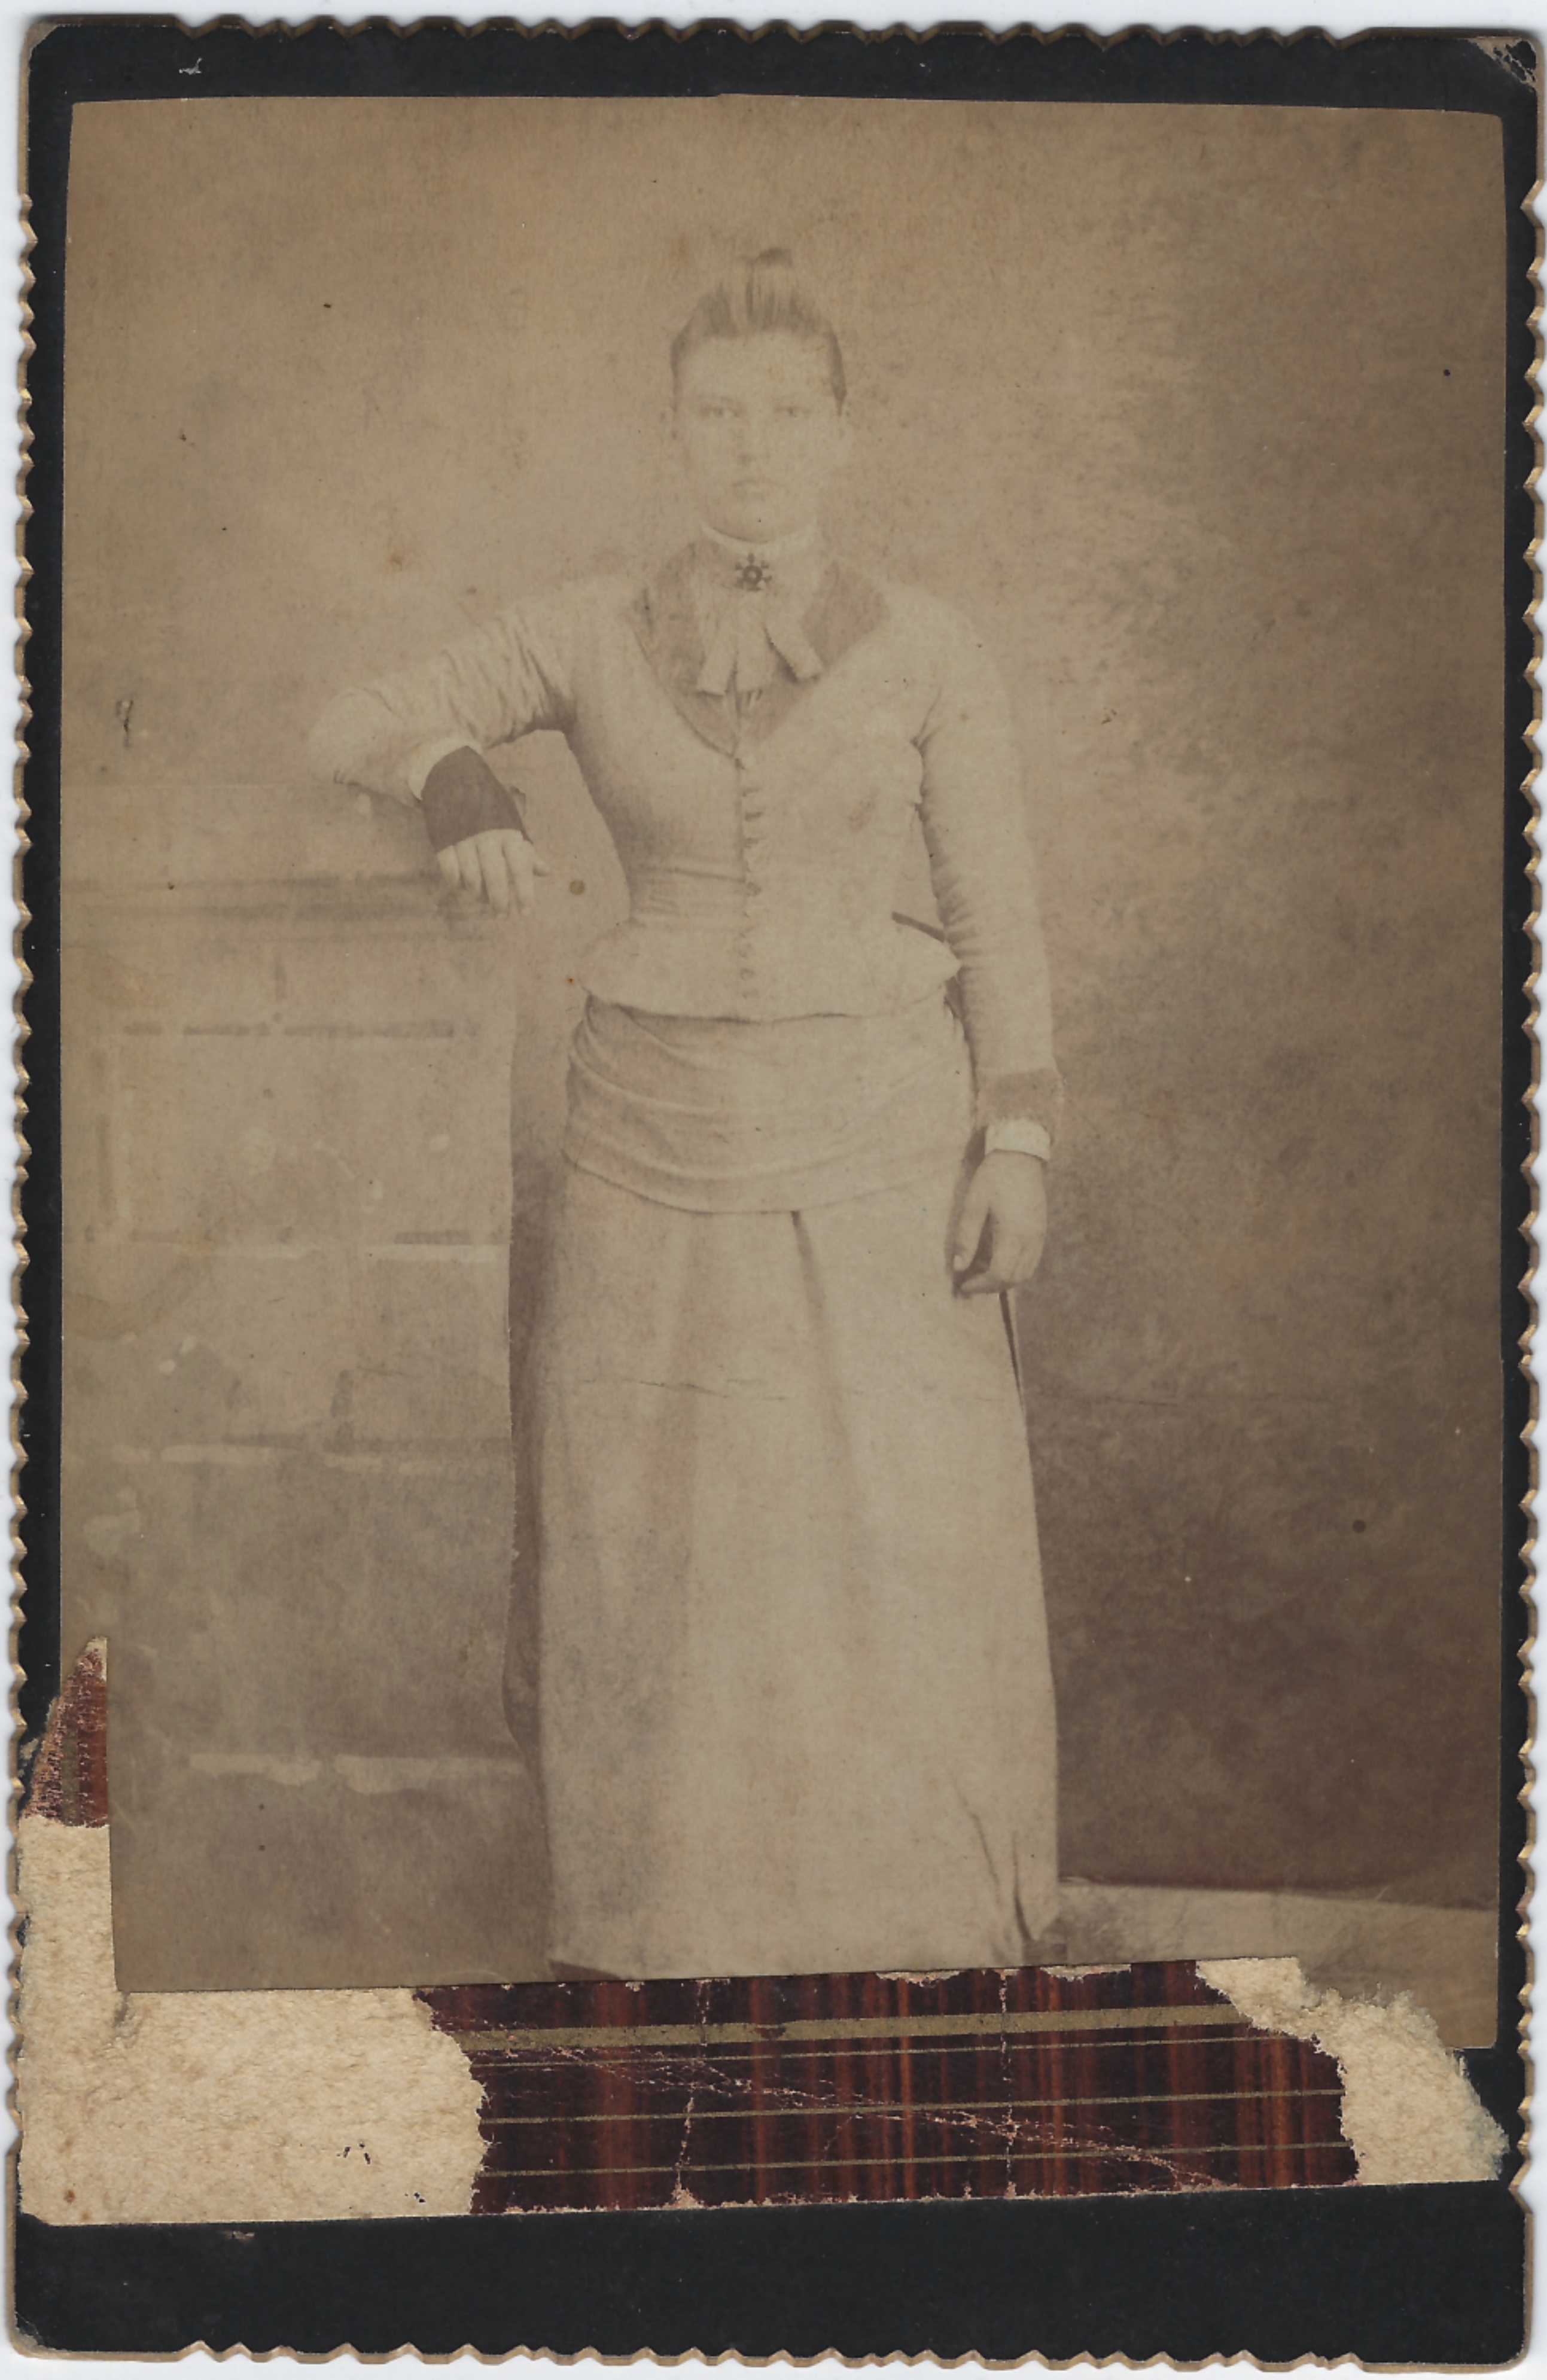
This photograph of Mary Elizbeth Anderson (1903-1994) is a cabinet card. Measuring 4 x 6 1/2 inches, it is mounted on sturdy cardboard that is embossed with the photography studio details, “Lighty Photo Co. Rossville, Ill.” The inscription on the back identifies the subject. Based on the image howerver, if I did not have this information, it could be surmised that the child is female, based on the center hair part. In the nineteenth century, both boys and girls wore dresses until potty trained, so the clothing the child wears is not an indication of gender. Based on the biographic details of the subject, this photograph was likely taken between 1904 and 1905.
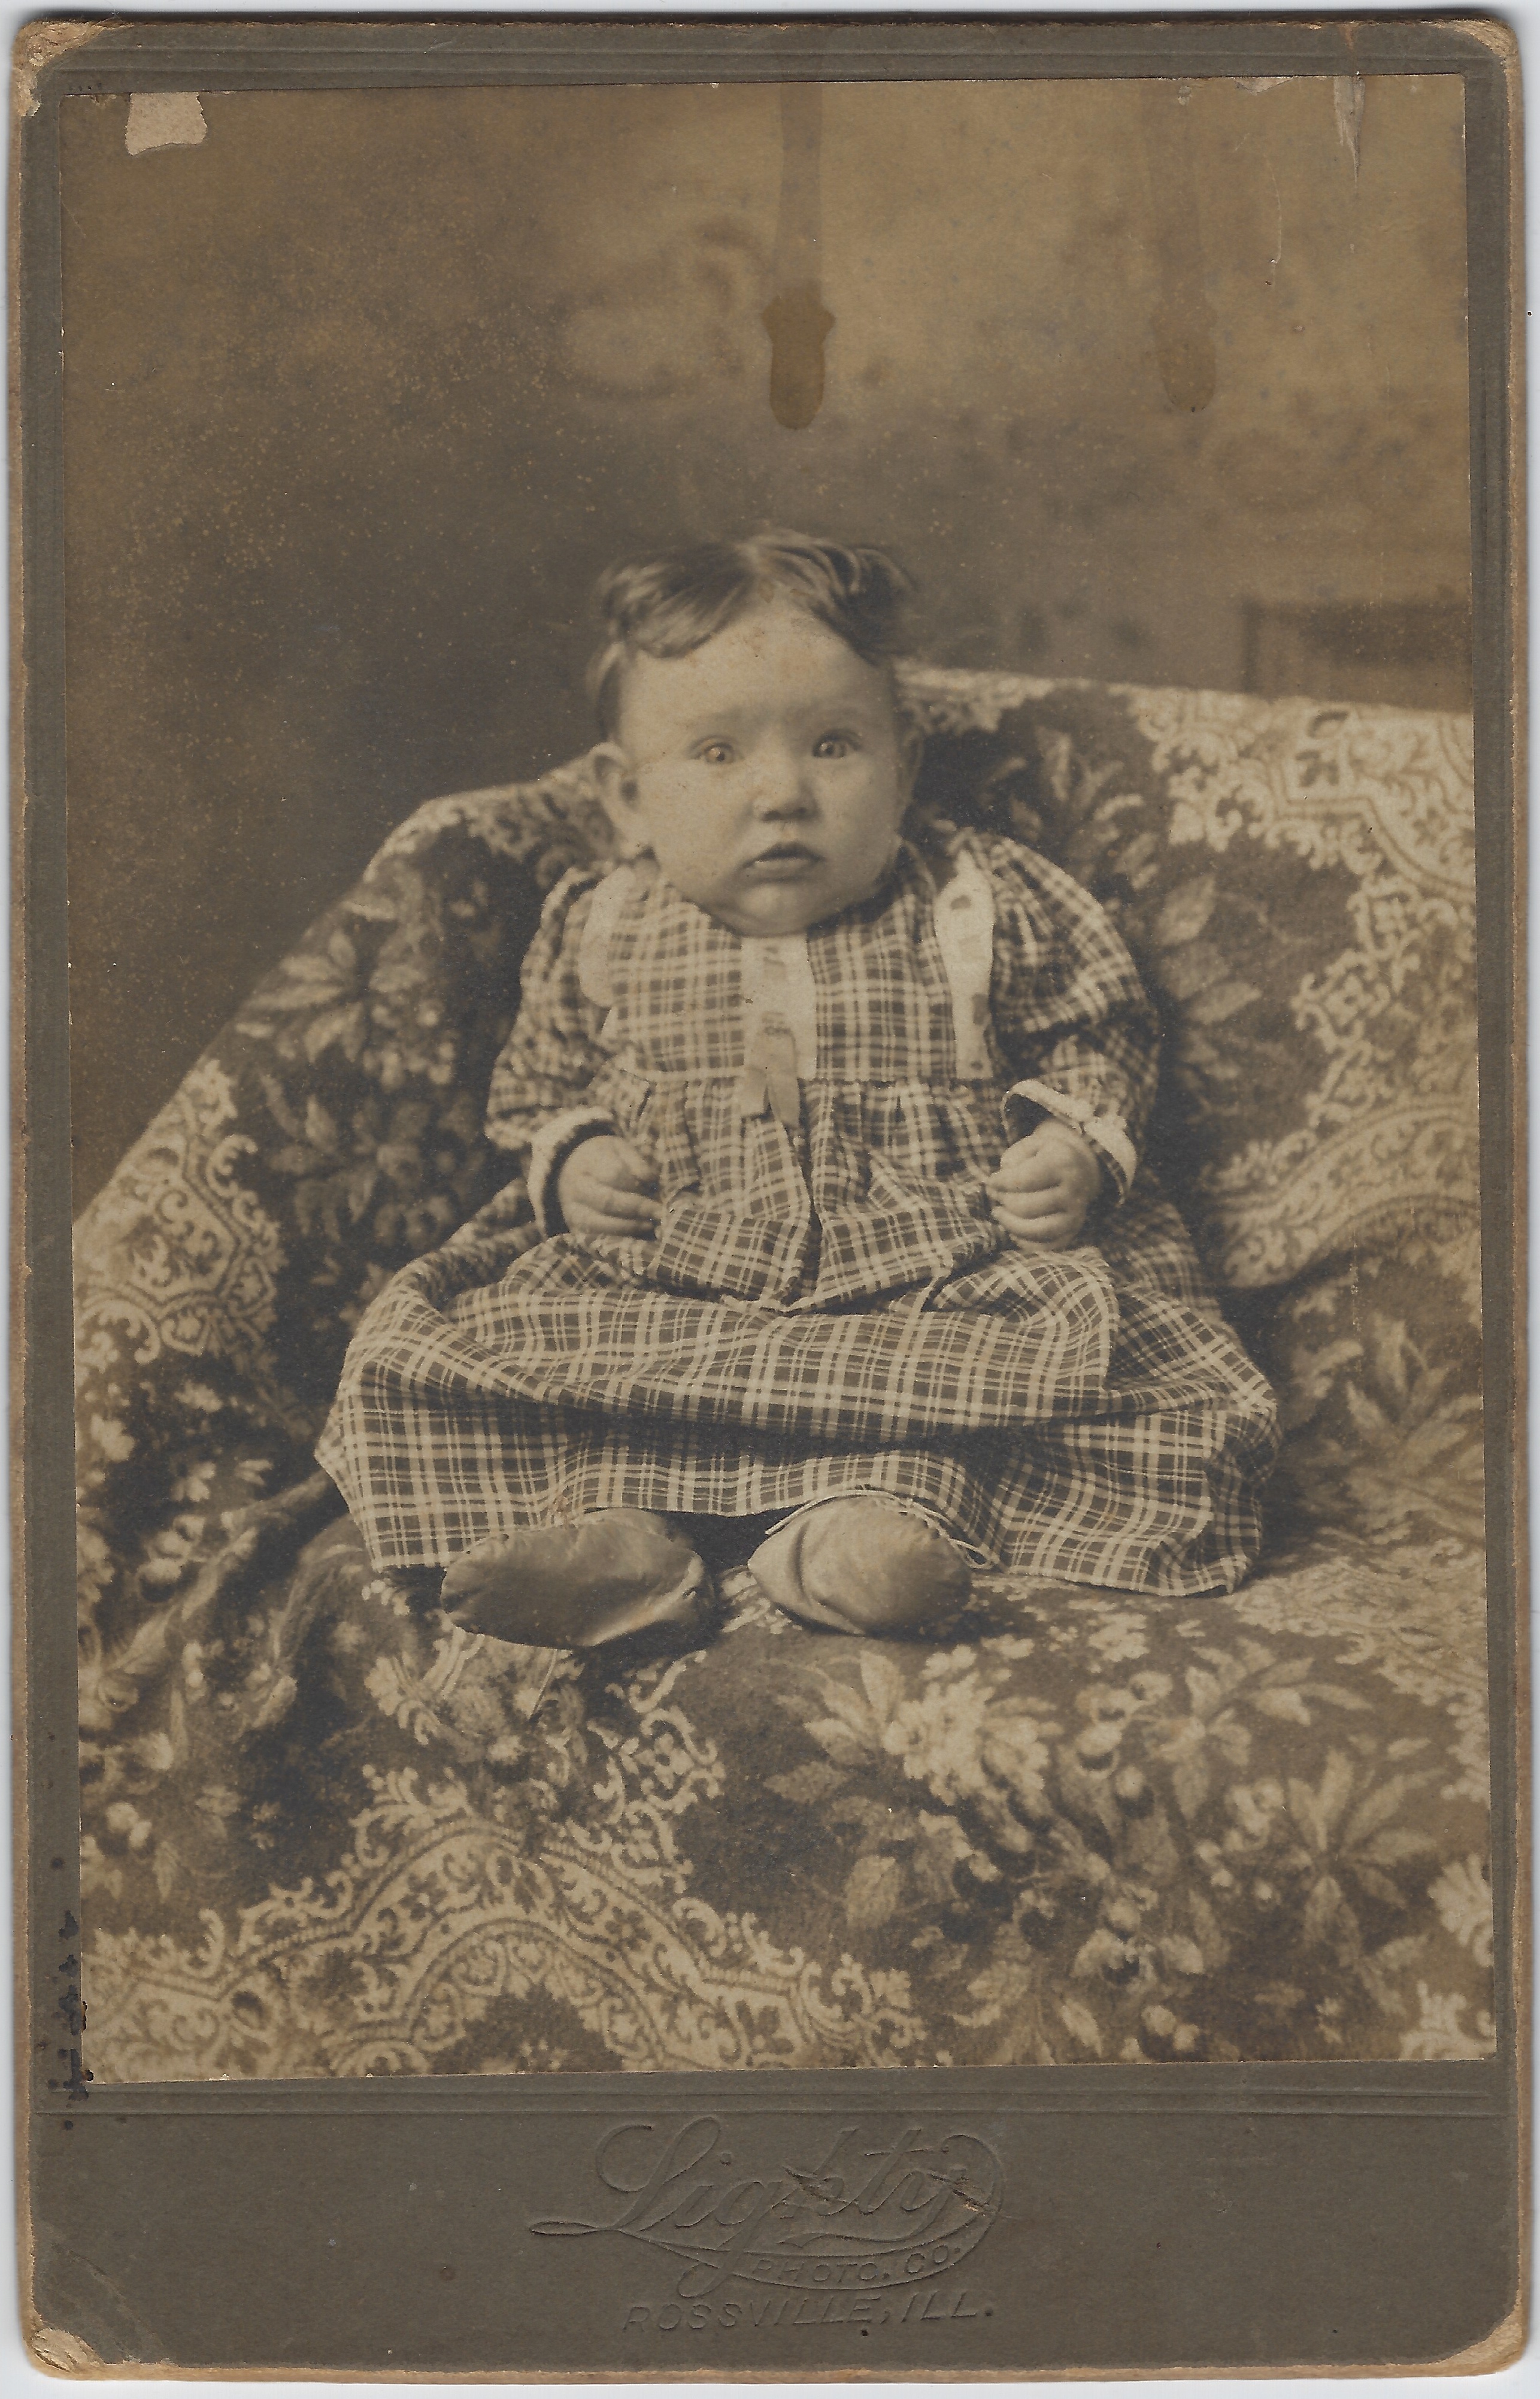
Idenifying features of this photograph:
- The printed photograph measures 4 X 5 1/2 inches.
- The actual photograph is pealing on the top left hand corner and rippling on the top right, pointing to a photo printed on actual paper.
- Paper printed photograph is mounted on 4 1/4 x 6 1/2 cardboard which is thick, firm and heavy.
- Cardboard mount is embossed on the bottom center with photographer’s details.
- Child has center hair part
Using Harding’s criteria of size, mount, edge and color to evaluate cabinet cards:
Size: 4 1/4 x 6 1/2 inches
Mount: Thick cardboard
Edge: Beveled edges
Color: Dark brown mount color, consistent with consumer preference change from cream to darker colors begining in 1880s.
Popular Types of Portraits
To create this glossary and primer, I explored two very helpful sites, Graphics Atlas and Date a Photograph, as well as using Wikipedia for simple definitions. Graphics Atlas is an indispensable resource for learning about the vast variety of photographic processes. Date a Photograph, produced by the Science + Media Museum, is a blog written by Colin Harding with simple tips on how to identify old photos. I have chosen a few examples from the family album exhibit to place them in context. The examples will refer to the following formats. (Organized alphabetically, not chronologically. For a timeline view, see Graphics Atlas timeline.)
Glossary
Bon Ton: Refers to the size of a tin type. Typically 2/12 by 3 1/2 inches. Four bon ton could be made using one plate, then cut down to size.
Cabinet Card:
Photographs, usually 5.5 x 4 inches, mounted on cardboard 6.5 x 4.25 inches. Imprint or embossed photographer’s brand usually on front, sometimes with elaborate design on back. Cabinet cards replaced carte de visite as the preferred format. Superseded by photo postcards as the most popular photo format around the first World War (1914-1918).
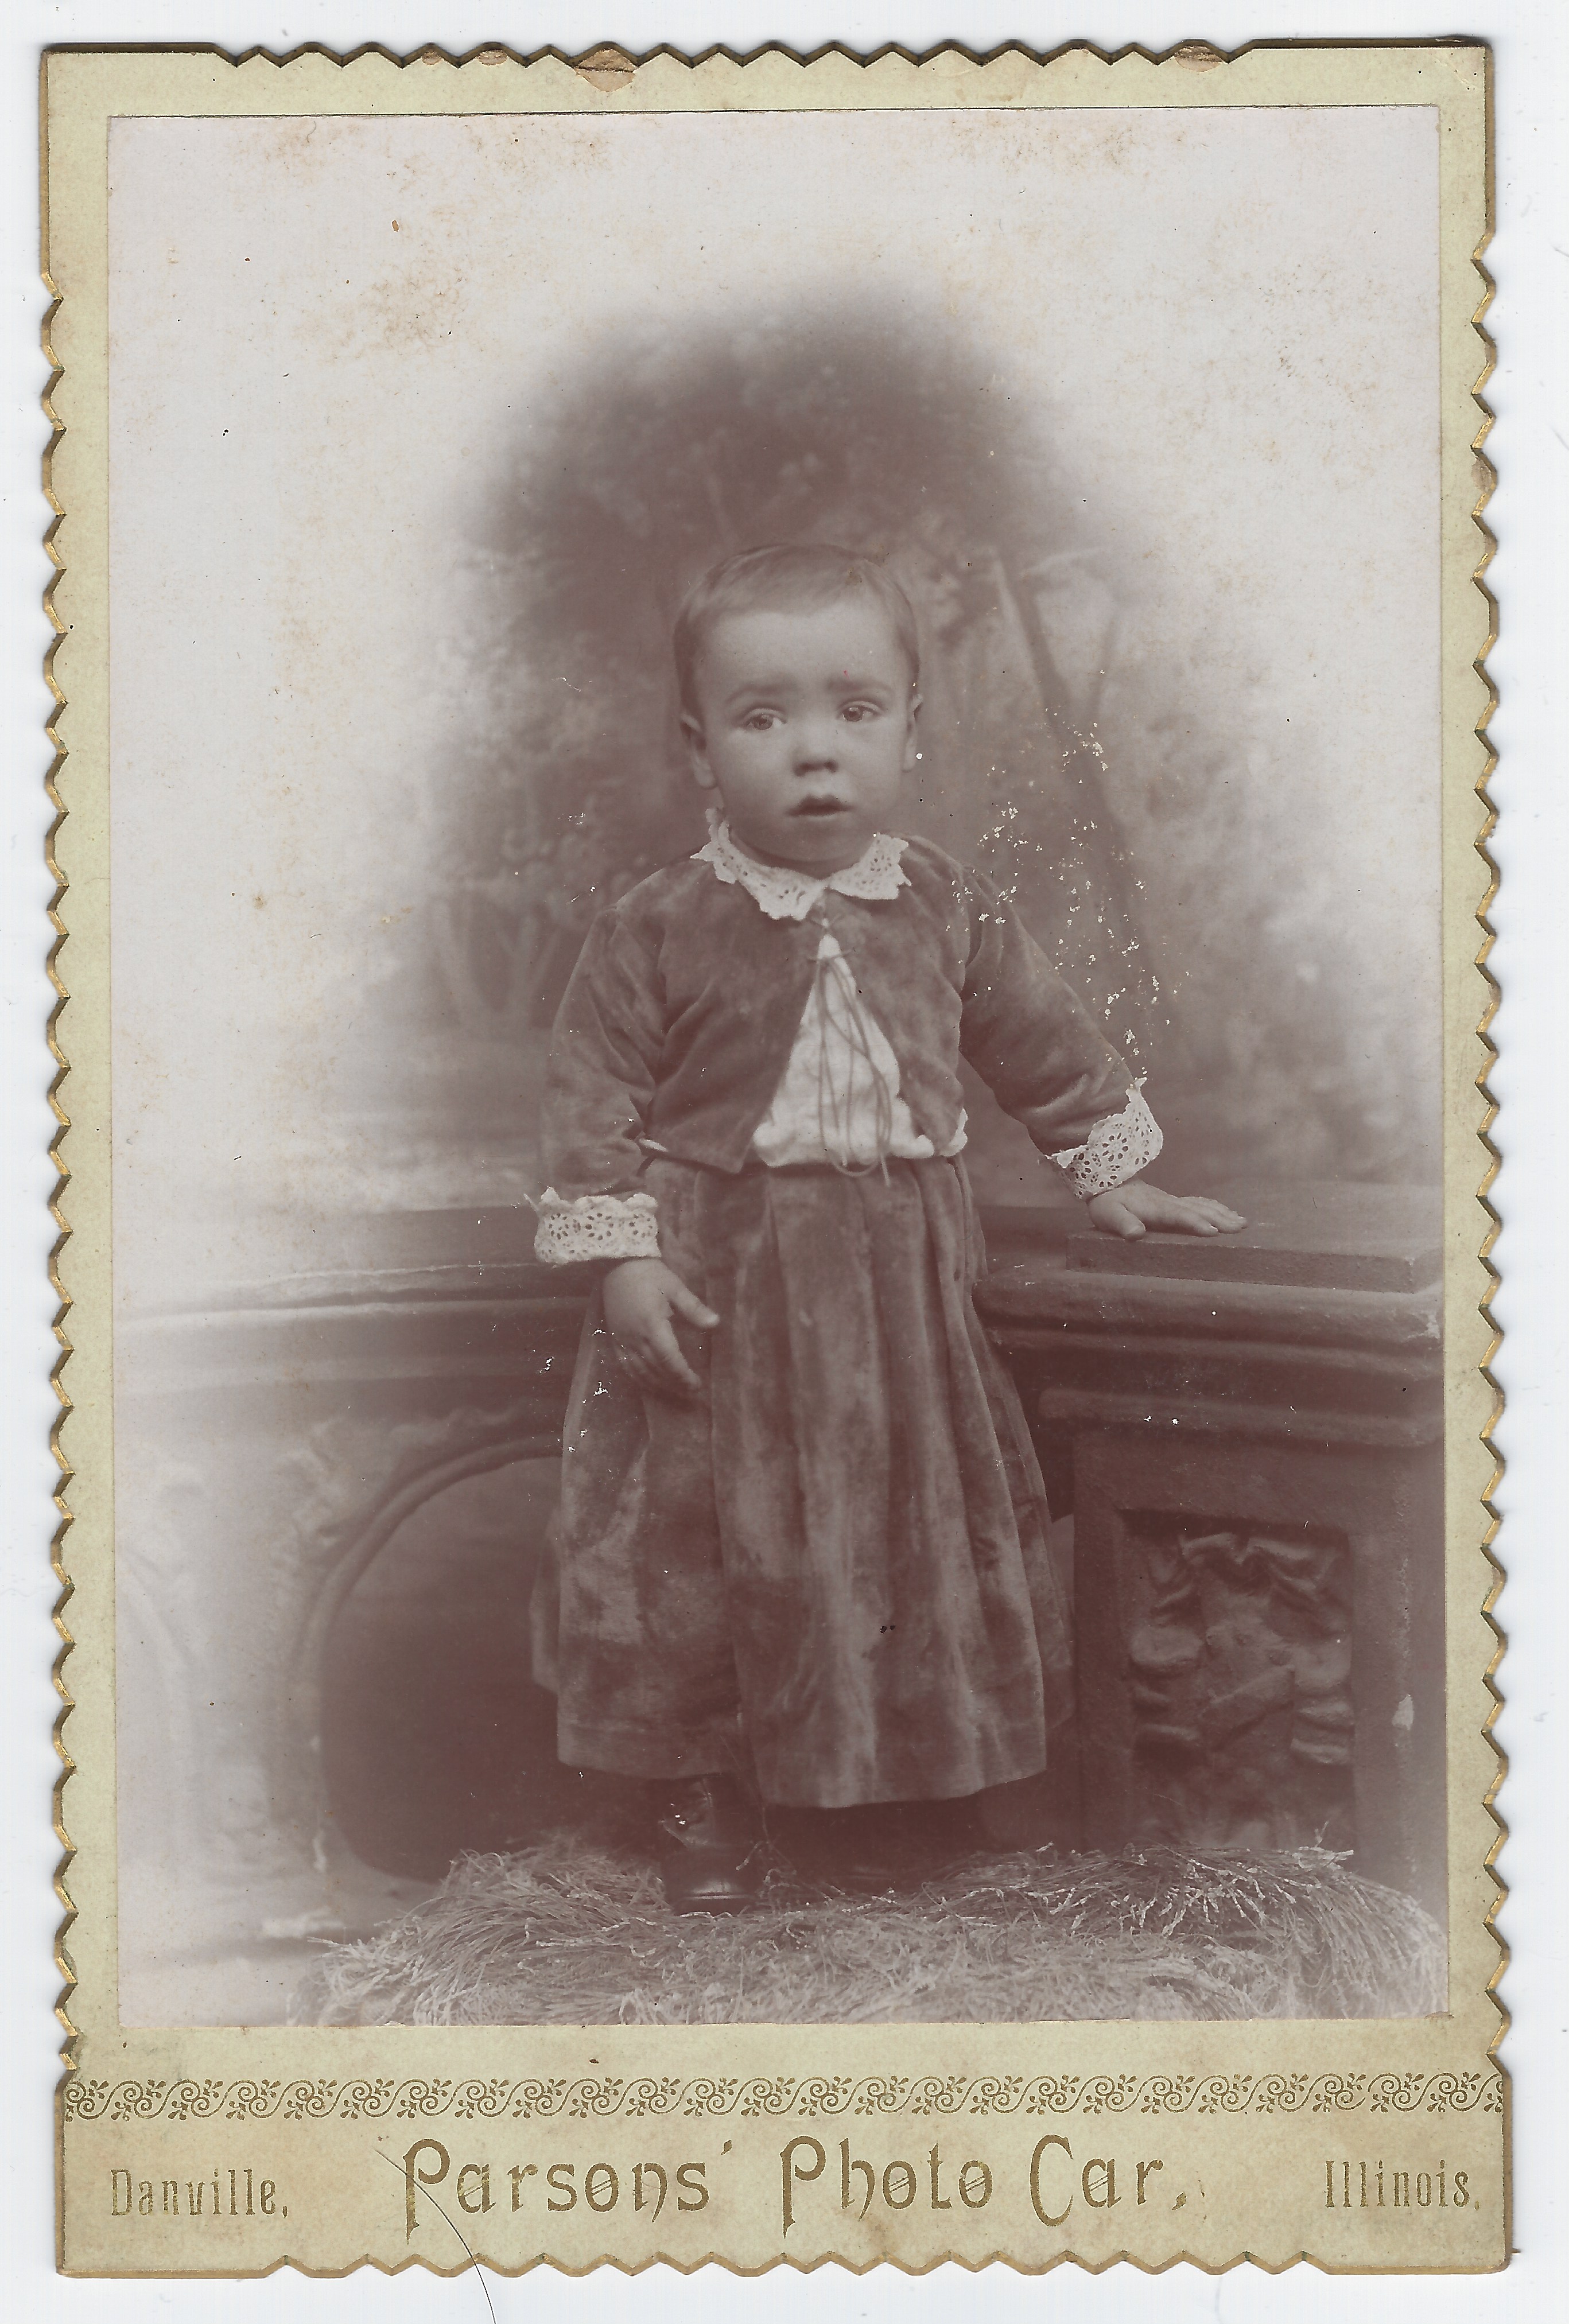
This photograph of a toddler is a cabinet card. The cardboard mount is is 4 x 6 1/2 inches and the photograph printed on paper is 4 x 5 1/2. The corners are not beveled, but the cardboard mount is decorated with scalloped cut edges, which are gold in color. The photographer’s details are imprinted on the bottom, which reads, “Danville, Parson’s Photo Car, Illinois”.
Also, there is a decorative gold boarder above this imprint. The card is a delicate cream color, which was very popular prior to the 1880s, when darker colors, such as dark green, brown and black came into fashion.
This photograph is a vignette style, with fading aroud the subject’s upper body, prompting a focus on the upper body and face. The subject is posed on a faux grass carpet, in front of a bench, with a painted backdrop depicting trees and a stream. Because of photographic processes used used for photographs of this type during this period, outdoor photography was not possible. The child’s hair is parted on the left, which indicates that despite the dress, lace cuffs and velvet material of the dress, this child is a boy. Cabinet cards were introduced in the 1860s. Cream color mounts became less popular in the 1880s, suggesting a time period of 1860-1880.
Cabinet Card Tips
The following tips are from “How to Date Your Old Photographs” by Colin Harding from the Science + Media Museum.
Size
The cabinet card was basically a larger version of the carte de visite. Paper prints measuring about 5.5 x 4 inches were pasted to standard sized cardboard mounts measuring 6.5 x 4.25 inches.
Mount
Cabinet card mounts are usually thicker than those of cartes de visite.
Edges
By the 1880s, cabinet card mounts sometimes had beveled edges, and were often finished in gold or silver.
Color
The color of the cardboard mount can also help date the photograph. Cream mounts were always popular, but bolder, dark colors like black, dark brown, green or burgundy began to appear in the 1880s and 1890s.
Carte de Visite:
Popular commercial studio portrait format. “Cartomania” was a term used by the popular press to describe the massive widespread popularity of this format. (Volpe, 2013). These photos became popular because prior to their introduction, formal studio portraits were prohibitively expensive for ordinary people. A new process developed by Aldophe Eugene Dederi in 1854 made the photographs affordable, collectible and exchangeable.
“Carte de Visite: photographs–small albumen prints mounted on cards 2-1/2 by 4 inches–were wildly popular and made for decades in countries around the world. The format was an international standard; for the first time, relatives and friends could exchange portraits, knowing they would find a place in the recipient’s family album–whether that album was located in Brooklyn, Berlin or Brazil. In addition, unlike earlier photographs made with such processes as the daguerreotype and ambrotype, cartes de visite could be sent through the mail without the need for a bulky case and fragile cover-glass. Their small size also made them relatively inexpensive, and they became so widespread that by 1863 Dr. Oliver Wendell Holmes would write, “Card portraits, as everybody knows, have become the social currency, the ‘green-backs’ of civilization.” – The American Museum of Photography
Carte de Visite Tips
The following tips are from “How to Date Your Old Photographs” by Colin Harding from the Science + Media Museum.
Size
Cartes were small paper prints – about 3.5 x 2 inches pasted onto standard sized cardboard mounts – about 4 x 2.5 inches. This size remained unchanged throughout the carte’s history.
Mount
If you have several examples of cartes you can compare, the relative thickness of the cardboard mount can indicate a rough date. Generally, the thinner the mount, the earlier the photograph.
Shape
The shape of the cardboard mount can also help with dating. Early cartes produced in the 1860s usually have square corners. In the 1870s, mounts with rounded corners were introduced.
-Identifying Characteristics, by Colin Harding, 2013
Daguerreotype:
“The daguerreotype was invented by Louis Jacques Mande Daguerre (1787 – 1851), and it was the first commercial photographic process. A highly-polished silver surface on a copper plate was sensitized to light by exposing it to iodine fumes. After exposing the plate in a camera, it was developed with mercury vapor.” – Colin Harding
“The daguerreotype was the first commercially successful photographic process (1839-1860) in the history of photography. Named after the inventor, Louis Jacques Mandé Daguerre, each daguerreotype is a unique image on a silvered copper plate.”-Daguerreobase
Daguerretoype Tips
Cases
Daguerreotype images are very delicate and easily damaged. Daguerreotypes always come in protective cases, often made of leather and lined with silk or velvet.
Plates
They were made on highly polished silver plates. Depending on the angle at which you view them, they can look like a negative, a positive or a mirror.
Tarnish
If exposed to the air, the silver plate will tarnish. Though they were sealed under glass, it is very common to find characteristic signs of tarnishing around the edges of the daguerreotype.
Size
Daguerreotypes were produced in a range of sizes, but most portraits are quite small, usually around 2×3 inches.
Tintype:

This photograph of twins Elizabeth (1839 -1918) and Mary (1839-1871) Kerns is a large plate tintype. The dimensions of this tintype are 5 x 7 inches, making it a rarer large plate bon ton tintype. Four bon tons (2 ½ x 3 ½) could be cut from one 5X7. Large plates were uncommon and usually 8 ½ x 6 ½ in size. I identified it based on the following features:
- Lacquered iron, thin metal support, not printed on paper
- Milky-white highlights,
- Blue drip lines can be seen on bottom and right hand borders
- Dark spots, or “nucleated spots” caused by absence of silver
- Bottom left hand corner has photographer’s thumb print
- Back is dark brown lacquer, shellac finish
- Photgrapher’s thumbprint left over from processing
“Tintype portraits were at first usually made in a formal photographic studio, like daguerreotypes and other early types of photographs, but later they were most commonly made by photographers working in booths or the open air at fairs and carnivals, as well as by itinerant sidewalk photographers. Because the lacquered iron support (there is no actual tin used) was resilient and did not need drying, a tintype could be developed and fixed and handed to the customer only a few minutes after the picture had been taken.” – Wikipedia
“…tintype, also known as a melainotype or ferrotype, is a photograph made by creating a direct positive on a thin sheet of metal coated with a dark lacquer or enamel and used as the support for the photographic emulsion. Tintypes enjoyed their widest use during the 1860s and 1870s…”
Tintype Tips
- Milky white highlights
- Sometimes hand colored
- Dark spots
- Pose and quality sometimes casual, cheaply made
- Irregular cut
- Lateral reversal
- Metal support often becomes bent
- Colludin emulsion process can over time lead to abrasion, image loss
- Often placed in decorative paper mats
- Rust on paper mat from iron support degrading
- Artifacts of process to note include: drip lines, photographer’s thumb print caused during developing process
- Riplles, or diagnoal lines, wave- like, caused by photo developing process, extra varnish
- Irridescence on edge of image caused by uneven varnishing
- Laquered on back with shellac, linseed oril, dar pigment, brownish color
- Often set in faxu outdoors scene, as process required indoor photography
- Comet spots, or spots with tail that resemble comet in sky, caused by dust specs during developoing process
- Sometimes have sharp corners, caused by photographer cutting image from larger plate.
Quality and Pose Notes:
Quality and pose of subject can offer clues about the photographer and the intent of the subject. Tintypes could be more informal and casual in composition. The quality can suggest that the photographer was “cheap” or offered a quick “low end product”. Characteristics of a less expensive photograph can include an irregular cut.
“Tintypes were often made in “multiplying cameras” in which multiple images could be made on a single plate. After processing, the images were cut apart with tin snips.Dark brown or black laquered iron support.” – Graphics Atlas

0 comments on “Identifying Old Photographs”